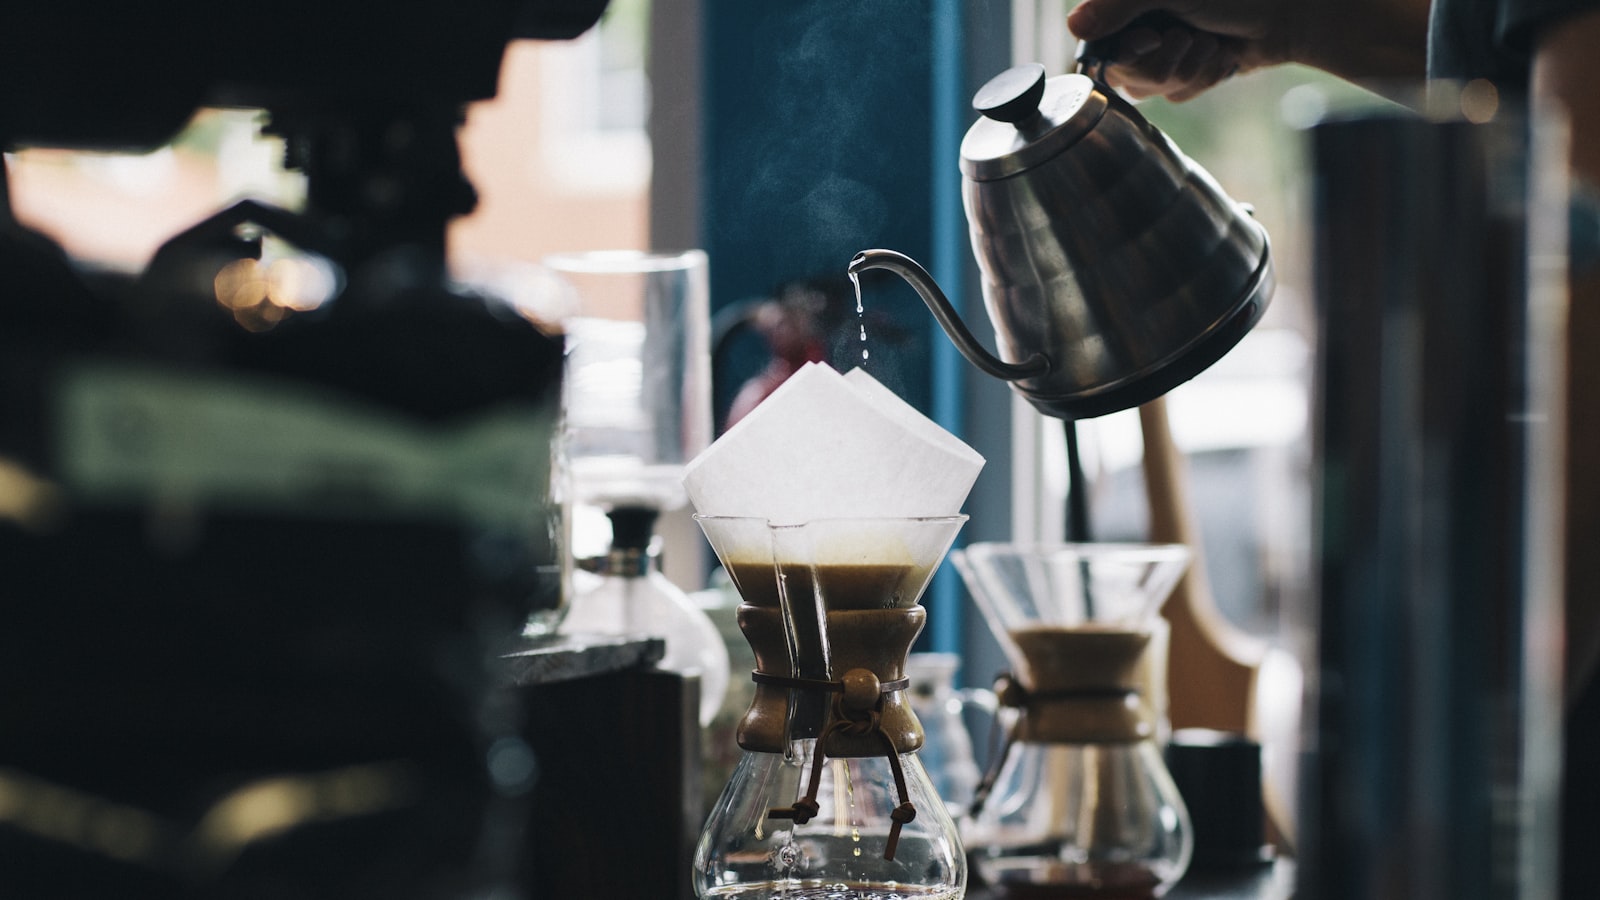
Pour-over is the method a lot of people picture when they think of careful home coffee: a cone, a paper filter, and a slow spiral of water over fresh grounds. It looks more ceremonial than it is. Underneath the ritual it's a simple, forgiving way to brew, and it rewards a little attention with a cup that's clean, bright, and easy to read.
It's also cheap to try. A basic dripper and a pack of filters cost less than a couple of café visits, and you may already own a mug and a kettle. If you've got the fundamentals of home coffee in place, pour-over is a natural next step and a great way to actually taste what a good bean has to offer.
What you'll need#
The equipment list is short, and you can start with less than you'd guess. At minimum you want a dripper (a V60, a flat-bottom brewer, or any cone that holds a filter), the right paper filters for it, fresh coffee, and hot water. That's genuinely enough to make a good cup.
Two extras make life easier without being essential on day one:
- A gooseneck kettle, which gives you control over where the water lands and how fast it pours
- A small kitchen scale, so you can weigh coffee and water instead of guessing
You can improvise at first — a steady hand and a measuring jug will get you surprisingly far. But once you're brewing regularly, those two items are the upgrades that pay off most. A scale in particular turns pour-over from a gamble into something you can repeat.
Grind and ratio#
Pour-over likes a medium grind, roughly the texture of table salt. Go too fine and the water crawls through, over-extracting the coffee into something bitter; go too coarse and it drains too fast, leaving a thin, sour cup. If you're grinding at home, start medium and adjust from there based on how long the brew takes and how it tastes.
For the ratio, a good default is around one gram of coffee to sixteen grams of water — a "1:16" brew, in the shorthand you'll see online. In practical terms, that's about 25 grams of coffee to 400 grams of water for a large mug. If you don't have a scale yet, roughly two tablespoons of coffee per six ounces of water gets you in the neighbourhood. Brew it once, taste it, and nudge the ratio stronger or weaker to suit you.
Grind and ratio are the two dials that matter most. Change one at a time and taste the result, because changing both at once tells you nothing about which one helped.
The pour, step by step#
Here's a simple routine you can follow every time. It looks like a lot written down, but the whole thing takes about three minutes.
- Boil your water and let it settle for around thirty seconds, so it's just off the boil.
- Put the filter in the dripper and rinse it with hot water. This washes away any papery taste and warms everything up. Tip the rinse water out of your mug or carafe.
- Add your ground coffee, give the dripper a gentle shake to level the bed, and set it on your scale if you're using one.
- Start your timer and pour just enough water to wet all the grounds — about twice the weight of the coffee. Watch them puff up and let this "bloom" sit for 30 to 45 seconds.
- Pour the rest of the water in slow, steady circles, starting near the centre and spiralling outward, keeping the water level roughly steady rather than flooding it.
- When you've poured all your water, let it drain. A total brew time of around three minutes is a good target.
Don't worry about matching those numbers exactly the first few times. The rhythm — bloom, then steady circular pours — matters more than hitting a stopwatch to the second.
One habit is worth building from the start: aim your pour toward the centre and keep the water off the paper walls of the filter. Water that runs straight down the sides slides past the coffee without brewing much of it, which thins the cup and muddles your timing. Keep the stream in the middle of the bed, spiralling gently out and back, so every ground gets its share. And pour in a few smooth pulses rather than one long flood — letting the water level drop a little between pours keeps the grounds moving and the extraction even. If you're using a mug rather than a carafe, give the finished coffee a quick swirl before you drink; the strength can settle unevenly, and a swirl blends it back together.
The bloom, and why it matters#
That first small pour isn't a flourish. Fresh coffee holds carbon dioxide from roasting, and when hot water hits it the grounds release a burst of gas that bubbles up and swells the bed. If you poured all your water at once, that gas would push the water away from the grounds and give you an uneven, weaker extraction.
Letting the coffee bloom for half a minute lets most of that gas escape first, so the rest of your water can actually soak into the grounds evenly. It's also a quiet freshness test: beans that puff up dramatically are lively and recently roasted, while old coffee barely reacts. If your bloom looks flat, the beans, not your technique, are probably the problem.
Reading your cup and fixing it#
The real skill in pour-over isn't the pour, it's learning to taste and adjust. After you've made a few cups, start paying attention to two things: how long the brew took to drain, and whether the coffee tastes sour or bitter.
If the cup tastes sour, thin, or weak, the water probably moved through too quickly. Try grinding a little finer, pouring a touch more slowly, or using slightly more coffee. If it tastes bitter, harsh, or dry, the water lingered too long — grind coarser, pour a bit faster, or ease off the coffee. Change one thing at a time and give it a day. Within a week you'll have a routine that suits your beans and your taste, and you'll be able to repeat it without thinking.
Making it your morning#
Pour-over rewards you for showing up. Once the steps are familiar you'll stop reading instructions and settle into a rhythm — rinse, bloom, pour, wait — that becomes a genuinely pleasant few minutes at the start of the day. It asks a little more of you than pressing a button, and it gives back a cleaner, more expressive cup in return.
If you enjoy the hands-on part but some mornings want to set things going and step away, keep a French press on the shelf too. Between the two you've got a bright, delicate cup and a rich, full-bodied one, and no morning left without options.