Great frothed milk is what turns a shot of coffee into a latte, a cappuccino, or a flat white — the drinks most people actually order. It's also the step that trips up a lot of home brewers, because it's easy to make either sad, flat milk or a stiff head of dry bubbles that plops onto the coffee like meringue. The good milk you get in a café sits somewhere in between: smooth, glossy, and pourable, with a texture like wet paint.
The reassuring part is that you don't need a professional machine to get there. You can froth milk beautifully with a steam wand, adequately with a cheap handheld whisk, and surprisingly well with nothing more than a jar and a microwave. This guide covers all three, plus the handful of ideas that make the difference regardless of your gear. If you're already pulling shots, it pairs naturally with making espresso at home; if you're brewing another way, frothed milk still lifts a strong cup into something café-like.
What "good" frothed milk actually is#
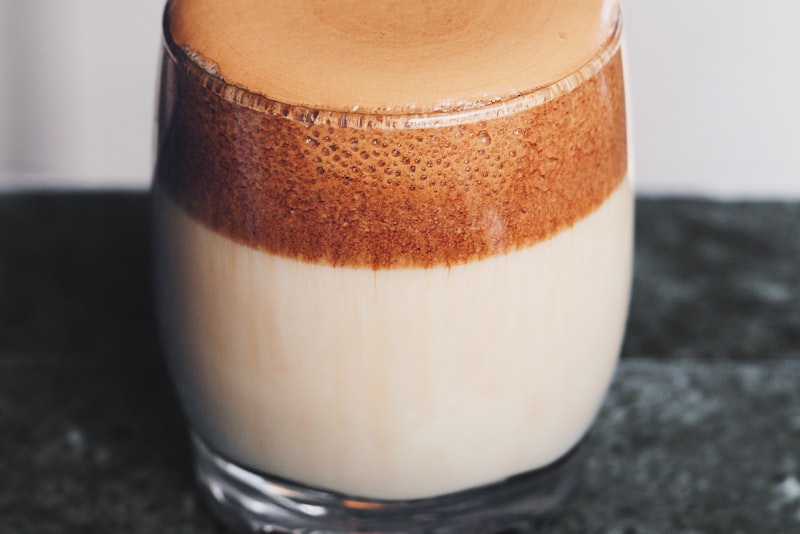
Before the how, it helps to know what you're aiming for. The goal isn't foam in the sense of big, dry, soapy bubbles. It's microfoam: milk with millions of bubbles so tiny you can barely see them, giving it a smooth, velvety, slightly thickened texture that pours in a glossy stream. That's what lets you blend it into espresso and, eventually, pour latte art.
Two things are happening when you froth milk well. You're adding air, which builds volume and foam, and you're heating it, which makes it sweeter and more comfortable to drink. The trick is doing both gently and stopping at the right moment. Overdo the air and you get stiff bubbles; overdo the heat and the milk turns thin, flat, and faintly scalded, losing the natural sweetness that makes a milky coffee taste good.
Frothing with a steam wand#
If your espresso machine has a steam wand, it's the best tool for the job, though it takes a little practice. Start with cold milk in a cold metal jug, filled no more than a third to halfway, because the milk will expand as you add air.
The technique has two phases:
- Stretching: Purge the wand, then place the tip just under the surface of the milk and turn on the steam. You want to hear a gentle, steady hissing or tearing sound — that's air being folded in. Keep the tip near the surface only for the first few seconds, until the milk has grown by roughly a quarter.
- Texturing: Sink the tip a little deeper and angle the jug so the milk spins in a smooth whirlpool. This has no more air going in; it's breaking down any big bubbles into fine, even microfoam. Keep it swirling until the jug is too hot to hold comfortably for more than a second or two, then stop.
Trust your hands, not a thermometer. When the base of the jug becomes almost too hot to hold, the milk is hot enough. Push past that and you cook out the sweetness.
Give the jug a gentle tap on the counter to pop any stray bubbles, swirl it to keep the milk glossy, and pour while it's fresh.
Frothing without a machine#
No steam wand? You have good options, and they make genuinely nice milk.
A handheld electric frother — the little battery-powered whisk — is cheap and effective. Warm your milk gently first (a short burst in the microwave or a small pan on the stove, without boiling it), then hold the frother just under the surface and let it spin until the milk grows and turns foamy. Tilt the cup so the whisk catches the surface and folds in air.
The jar method needs nothing you don't already own. Pour cold milk into a jar with a tight lid, filling it no more than a third. Screw the lid on and shake hard for 30 to 60 seconds until the milk doubles in volume and turns foamy. Take the lid off and microwave the jar for around 30 seconds — the heat stabilises the foam, and the foam rises to the top so you can spoon it out. It won't give you latte-art-grade microfoam, but for a comforting home cappuccino it's genuinely good.
A French press works too: pour in warm milk, then pump the plunger up and down briskly for half a minute to whip air through it.
Whichever no-machine route you take, the milk you choose matters as much as the method. Whole milk froths most easily and tastes richest, because the fat helps hold the foam together and gives it that silky body. Lower-fat milk froths into lighter, drier foam that collapses faster. Among plant milks, results vary a lot: oat milk made for baristas tends to steam and froth surprisingly well, while some almond and rice milks stay thin no matter what you do. If a particular milk refuses to hold foam, it's usually the milk, not your technique — try a barista-labelled version before you blame yourself.
Matching foam to the drink#
Different drinks want different amounts of foam, and knowing the rough ratios helps you steer. A cappuccino is the foamiest — roughly equal parts espresso, steamed milk, and airy foam. A latte is milkier and smoother, with more steamed milk and just a thin layer of foam on top. A flat white sits between them, with silky microfoam and very little dry foam, poured to blend right into the espresso.
So if you're making a cappuccino, spend a little longer on the stretching phase to build more foam. For a flat white or latte, add less air and focus on that smooth, glossy texture. It's the same milk and the same tools — you're just choosing how much air to fold in.
Bringing it together#
Frothing milk is one of those skills that feels awkward for a week and then suddenly clicks. Keep the milk cold to start, add air only briefly, texture it into a smooth whirlpool, and stop heating before it gets too hot to hold. Do that and you'll get glossy, pourable milk whether you're using a proper wand or a jam jar.
Once your milk is behaving, the last piece is what goes under it. A well-frothed jug is only half a great drink — the other half is the coffee it sits on. If you haven't yet, it's worth getting your espresso dialled in so shot and milk finally meet as equals, and your home flat white starts rivalling the one down the street.